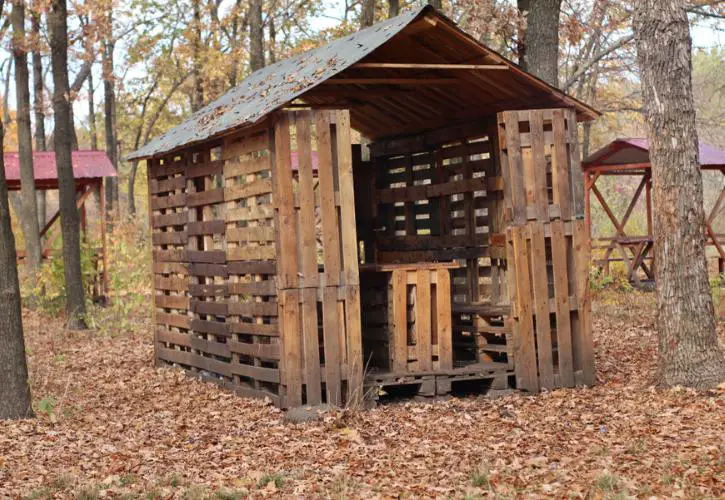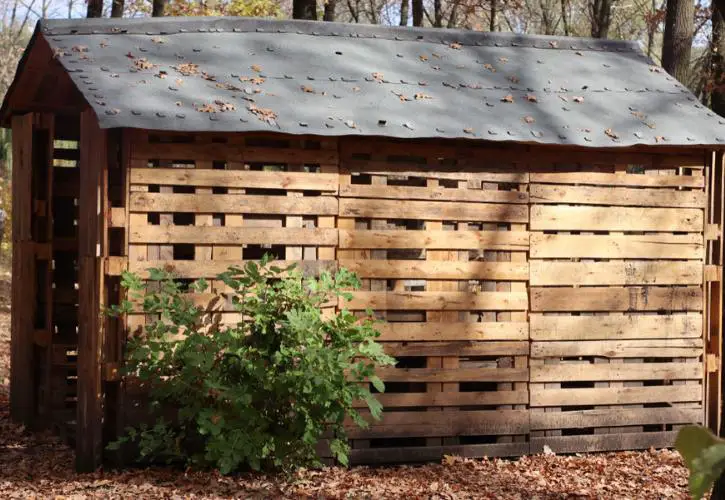
There’s a common misconception that cabin life is expensive. If you feel led to this lifestyle, you can make it work on any budget. One inexpensive way to build a cabin is DIY pallet cabins.
Pallet cabins are a fabulous way to go green and put recyclable materials to good use. These rustic structures are crafted with inexpensive pallets you can often find for free. In this post, you’ll learn the pros and cons of pallet cabins and see how a DIY cabin comes together from the ground up.
The Ups and Downs of DIY Pallet Cabins
As with anything else, pallet cabins have their pros and cons. For many, the good outweighs the bad, but you’ll have to decide for yourself!
DIY Pallet Cabins Pros
Let’s start with the positive first, shall we? Here are a few of our favorite things about these adorable structures.
- Pallets can be gotten for extremely low prices, sometimes even for free.
- Most grocery and furniture stores have an abundance of pallets, so you don’t have to wait for a lumber order.
- The wood used to build pallets is highly durable and easily repairable.
- Pallets are environmentally friendly and recyclable.
- Pallet cabins come together quickly, unlike more sophisticated blueprints.
DIY Pallet Cabins Cons
Pallet cabins are fantastic, but nothing can be perfect. This short list contains a few things you should know before starting your DIY project.
- Pallets are the perfect place for snakes, rodents, and spiders to hide. Beware of this when storing them outside!
- Pallet cabins are small, almost like rugged tiny houses.
- It can be challenging to transport pallets, especially if you don’t have a truck bed or trailer.
- Pallets absorb spills, which can be dangerous if they’ve been used to transport toxic chemicals.
How to Build DIY Pallet Cabins From the Ground Up

Building a pallet cabin is a simple project anyone can do. Take a long weekend to create fun memories and something that will last. A pallet cabin blueprint will give you the exact details of where to place each thing, but here’s a brief overview.
Step One: Determine Your Foundation
While you can place your pallets directly on the ground, many carpenters recommend laying a foundation first. Concrete blocks create a level surface that keeps your wood healthy. Plus, they’re cost-effective, keeping with our budget-friendly theme.
Step Two: Lay the Flooring
Once your foundation is complete, you can work on the flooring. For most people, this is simply clean pallets placed over the foundation. Try different sanding techniques for high-end flair.
Ensure that your flooring is strong enough to withstand not only foot traffic but the assembling of the house.
Step Three: Build the Walls
It’s time to build the walls of your little pallet cabin. You can lay them one on top of another vertically, or you can add a little more support. If you prefer a more substantial structure, join each set of walls with plywood at the back.
Step Four: Add Windows and Doors
Unless you’re using your pallet cabin as a gardening shed, you’ll probably want to let some light in. Follow your blueprint (or heart!) and lay the framework for your windows and doors.
Now that you know where your windows are add your roofing beams.
Five: Set the Roof in Place
If you live in a place with extreme weather, add insulation between slats. Then place smaller pieces of pallet wood over the pallets to look like siding. After that, the sky’s the limit! Paint your wood or add flowerboxes; the choice is yours.
Once your siding is complete, add plywood to your roofing beams. When it comes to your roof, you have a few options. You can add a tin roof, a popular way to use spare pieces of sheet metal. If you want a more traditional top, cut your pallet slabs into smaller pieces for shingles.
Step Six: Add Embellishments
Now, it’s time to make your DIY cabin your own. A few fun things you can add to pallet cabins include:
- A deck or small patio area for entertaining
- Sconces to add much-needed evening light
- Window boxes for a cottage-core vibe
- An attached outhouse
- Steps (especially helpful if your cabin is off the ground)
There you have it; an adorable DIY pallet cabin is six easy steps, give or take a few.
Pallet Cabins FAQ
There’s a lot of curiosity behind pallet cabins, especially with their recent rise in popularity. After reading this article, you’re sure to be a DIY expert.
How Can I Use My DIY Cabin?
Pallet cabins are a fun way to embrace minimalistic living. Many people use their cabins as tiny houses.
If you prefer a little more living space, you can use your DIY project as a gardening shed, chicken coop, she-shed, man cave, or kid’s play house.
How Many Pallets Do I Need to Make a Cabin?
Depending on the size of your project, you’ll need 80-100 pallets. Look for spare pallets on the Facebook marketplace, your local grocery stores, hardware stores, and construction sites. With a bit of work, you’ll get your pallets in no time.
How Long Does It Take To Build a Pallet Cabin?
If you’re following a simple blueprint, you could easily have your pallet cabin completed in a weekend. More complicated designs could take 4-5 days, depending on the number of helpers you have.
How Long Will My Pallet Cabin Last?
A little effort goes a long way! Treat the wood with a weather-resistant formula to make your pallet cabin last years. Treated pallets can last decades, whereas untreated pallet cabins have a lifespan of 3-5 years.
What Tools Do I Need to Complete This Project?
While you don’t need to buy out Home Depot, a few tools make any project a breeze. For this project, I suggest using the following:
- A hand drill
- Circular saw, or chop saw
- Hammer
- Sandpaper
- Tape measure
- Crowbar
Tag us on social media if you decide to tackle this fun DIY! We can’t wait to see your designs.

About to embark on my first pallet cabin building project, constructing a makeshift home for a homeless friend. Thank you for the informative article.